Добавление неограниченного числа поддоменов через mod_rewrite
Внимание! domain.ru везде необходимо заменить на ваш домен, для которого создаются поддомены.
1.Заходим в панель хостинга, раздел Домены.
2.Добавляем поддомен (sub.domain.ru) в панель хостинга.
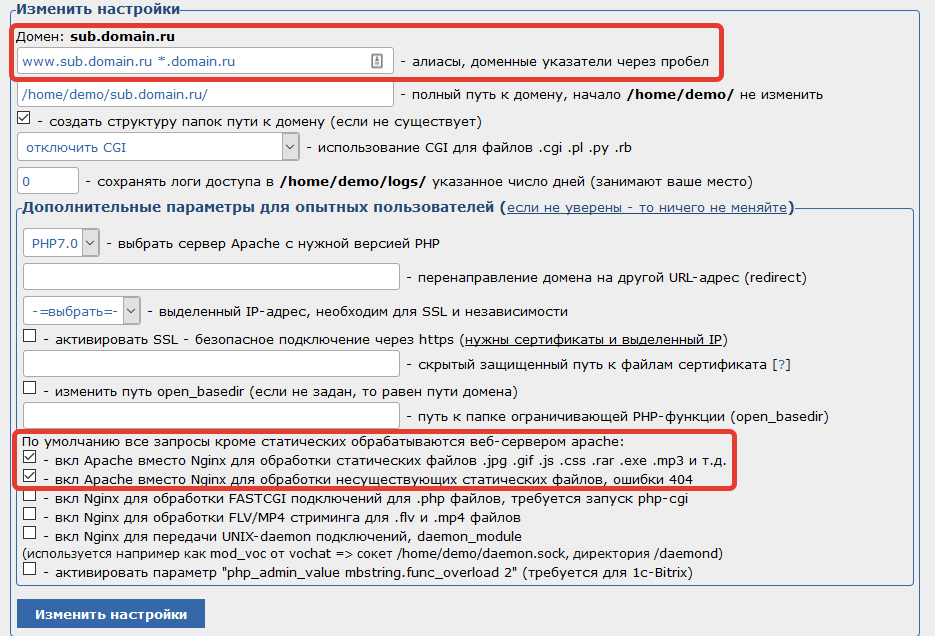
3.Переходим по ссылке настройки напротив поддомена, открывается страница настроек домена.
-Поле Алиасы: добавляем запись *.domain.ru
-Ниже два пункта вкл Apache вместо Nginx для... - ставим галочки.
-Нажимаем кнопку Изменить настройки
4. Возвращаемся в раздел Домены, переходим по ссылке DNS напротив основного домена domain.ru.
5. На открывшейся странице, под таблицей настроек, есть пустое поле. Добавляем в это поле *, A, IP-адрес. IP-адрес берем там же, в других полях настроек DNS или в самом низу страницы, IP-адрес по умолчанию (смотрим изображение).
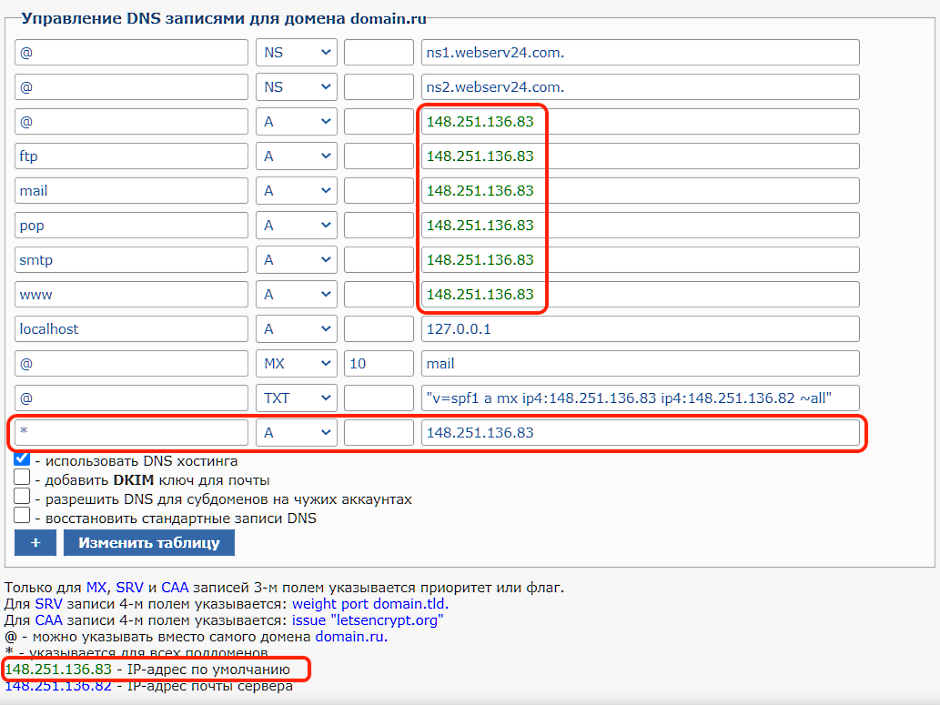
6. Нажимаем Изменить таблицу
7. Переходим в раздел WebFTP в панели хостинга. Там переходим в папку домена, у нас она называется sub.domain.ru
8. Создаем в папке файл с названием .htaccess, точка в начале обязательна.
9.Открываем файл и добавляем код:
RewriteEngine On
RewriteCond $1 !^subs/
RewriteCond %{HTTP_HOST} !^(www.)?domain\.ru$ [NC]
RewriteCond %{HTTP_HOST} ^(www.)?([a-z0-9-]+)\.domain\.ru$ [NC]
RewriteRule ^(.*)$ subs/%2/$1 [L]
!Не забудьте заменить domain\.ru здесь на ваше доменное имя.
10. В этой же папке (папка домена) создаем папку с именем subs.
11. Переходим в папку subs, в ней и будем создавать папки всех поддоменов, которые нам нужны. Например, такой путь /home/ЛОГИН_ХОСТИНГА/sub.domain.ru/subs/name в бразуере будет открываться как http://name.domain.ru.
Такой способ создания поддоменов удобен тем, что не надо лишний раз добавлять домен в панели хостинга в разделе Домены. Достаточно через FTP-клиент или в разделе WebFTP добавить папку и поддомен сразу будет доступен.